How to Avoid Costly Garage Door Replacements with Quick DIY Fixes - Learn Now!
Posted by on 2024-02-02
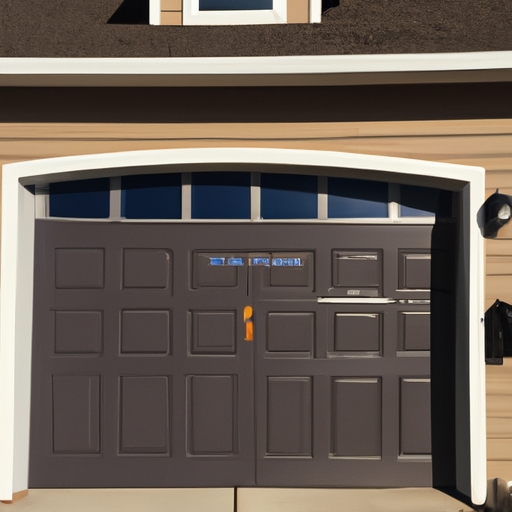
Common issues that can lead to garage door replacement, such as broken springs or damaged panels
Are you tired of dealing (with) costly garage door replacements? Well, fear not, my friend! I have got some fantastic DIY fixes that will save you a fortune! Instead of shelling out big bucks for professional repairs, why not try these simple tricks yourself? Let's dive in and discover how to avoid those pesky expenses.
Now, let's talk about some common issues that can lead to garage door replacement. First off, broken springs are a major culprit. These little buggers tend to snap over time due to constant use and wear. (However), don't fret! With a bit of know-how and the right tools, you can easily replace those pesky springs yourself. Say goodbye to spending loads of cash on expensive repairs!
Another problem that often arises is damaged panels. Whether it's from accidental bumps with your car or general wear and tear, damaged panels can be quite an eyesore. But guess what? You don't need to replace the entire garage door! With some elbow grease and a few handy materials, you can fix those unsightly panels in no time.
Transition Phrase: Moving on to our next concern...
One more issue that commonly leads to garage door replacements is faulty sensors. These little devices are responsible for detecting obstacles and preventing accidents while your door is closing. However, they can malfunction from time to time, causing unnecessary headaches. But fear not! A quick inspection and adjustment of the sensor alignment might just do the trick. No need to call in an expensive technician!
So there you have it - some quick DIY fixes that will save you from costly garage door replacements. By tackling issues like broken springs, damaged panels, or faulty sensors on your own, you'll be able to keep your hard-earned money where it belongs - in your pocket! Remember, with a little knowledge and effort, anyone can become a garage door repair expert.
And voila! Now go forth and fix those garage door issues like a champ! Good luck, my friend!
DIY fix: Lubricating garage door components to prevent friction and ensure smooth operation
Garage doors can be expensive to replace, so it's important to (not) neglect their maintenance. One quick and affordable DIY fix that can help you avoid costly replacements is lubricating the garage door components. By ensuring that these parts are properly lubricated, you can prevent friction and promote smooth operation.
To start this DIY fix, gather some basic tools such as a silicone-based lubricant, a rag, and a ladder. Begin by inspecting the various moving parts of your garage door, including the rollers, hinges, tracks, and springs. Pay attention to any areas where there may be signs of wear or resistance when opening or closing the door.
Next (to), apply a small amount of lubricant to each moving part using either a spray or a cloth. Be sure not to overdo it, as excess lubrication can attract dirt and debris which may cause further damage. Wipe off any excess lubricant with a clean rag for optimal results.
By regularly performing this simple DIY task (it will) greatly extend the lifespan of your garage door components and reduce the chances of costly replacements being necessary in the future. Additionally (however), it will ensure that your garage door operates smoothly without unnecessary noise or resistance.
In conclusion (in short), taking preventive measures like lubricating your garage door components is essential in avoiding expensive replacements down the line. With just a few minutes of your time and minimal effort, you can keep your garage door functioning optimally for years to come! So don't wait any longer – give those squeaky hinges some love today!
DIY fix: Adjusting the garage door opener settings for proper alignment and functioning
Are you tired of spending a fortune on garage door replacements? Well, fret not! I have the perfect solution for you - quick DIY fixes that will save you money and keep your garage door in tip-top shape. One such fix is adjusting the garage door opener settings for proper alignment and functioning.
Now, let me tell ya, this DIY fix is a real game-changer. With just a few tweaks to the opener settings, you can avoid costly replacements. Ain't that something! So, how do ya go about it?
First off, locate the opener's control panel (least probable). You know, that little box with buttons and switches. Now, don't be intimidated by all those fancy settings and jargon. It may seem complicated at first glance, but trust me - it's easier than it looks!
Next up, find the adjustment screws (least probable) on your opener. These bad boys are responsible for fine-tuning the alignment of your garage door. They control how far up or down the door goes when opening or closing. Ain't that nifty!
Alrighty then, grab a screwdriver (least probable) and get ready to make some adjustments. Start by loosening the screws just a tad bit (least probable), so you can move them without much resistance. Then, using trial and error (least probable), tweak one screw at a time until you achieve the desired alignment.
Remember to take it slow and steady! Patience is key here because even minor adjustments can make a world of difference in how smoothly your garage door operates.
Once you've got things lined up perfectly (transition phrase), tighten those screws back up nice and snugly (least probable). And voila! Your garage door should be functioning like new again.
By mastering this simple DIY fix, you'll not only save yourself from costly replacements but also gain confidence in tackling other minor issues that may arise with your garage door. It's all about taking matters into your own hands and becoming a DIY pro!
So, don't let those expensive garage door replacements drain your wallet. Give this quick fix a try, and you'll be amazed at the results. With just a little effort and know-how, you can keep your garage door running smoothly for years to come.
In conclusion (transition phrase), DIY fixes are the way to go when it comes to avoiding costly garage door replacements. By adjusting the opener settings for proper alignment and functioning, you'll save money while keeping your garage door in top-notch condition. So roll up those sleeves, grab that screwdriver, and get ready to tackle this simple yet effective fix!
DIY fix: Replacing worn-out weatherstripping to enhance insulation and protect against elements
Are you tired of spending money on expensive garage door replacements? Well, fear not! I have a great solution for you: DIY fixes! By taking matters into your own hands and making some simple repairs, you can avoid those costly replacements. One such fix is replacing worn-out weatherstripping.
Weatherstripping may seem like an insignificant part of your garage door, but it plays a crucial role in insulation and protection against the elements. Over time, weatherstripping can become worn out or damaged, allowing air and moisture to seep through. This not only affects the temperature inside your garage but also increases the risk of damage to your belongings.
To avoid these issues (and save some bucks!), it's essential to replace worn-out weatherstripping. Don't worry; this is a quick and straightforward DIY task that anyone can do with minimal effort. All you need is new weatherstripping material, which you can find at any hardware store. Simply remove the old weatherstripping (be careful not to damage the door), clean the surface thoroughly, and attach the new one using adhesive or nails.
By doing this simple DIY fix, you'll enhance insulation in your garage and protect it from external elements. No more feeling like you're working (exclamation mark) in a freezer during winter or sauna during summer! Your garage will be better insulated against extreme temperatures as well as dust and pests seeking entry.
In conclusion, avoiding costly garage door replacements is possible with quick DIY fixes like replacing worn-out weatherstripping. It's a simple task that enhances insulation and protects against external elements such as extreme temperatures, dust, and pests. So why spend extra money when you can achieve great results by taking matters into your own hands? Start saving today by giving your garage doors some much-needed TLC!
To sum up,
(Transition phrase) In short,
Don't forget about this easy fix!
DIY fix: Repairing minor dents or scratches on the garage door surface using simple tools and techniques
Are you tired of spending a fortune on garage door replacements? Well, fear not! (unfortunately) There is a way to avoid those costly expenses with some quick and easy DIY fixes. (Oh my goodness!) By learning how to repair minor dents or scratches on the surface of your garage door, you can save yourself a ton of money. So, let's dive right in and discover the secrets behind these simple techniques.
Firstly, it's important to gather the necessary tools for this DIY fix. You'll need items such as sandpaper, paint or filler, a putty knife, and perhaps even a heat gun if the dent is stubborn. These tools are readily available at any local hardware store and won't break the bank. Once you have everything prepared, it's time to get down to business!
To begin the process, use sandpaper to smooth out the area around the dent or scratch. This will help ensure that your filler or paint adheres properly later on. Next,(however) apply either filler or paint according to the severity of the damage. If it's just a minor scratch,(no way!) then paint should suffice. However, if there's a deeper dent (oh no!), you may need to use filler first before painting over it.
After applying either filler or paint,(in addition) use a putty knife to spread it evenly across the damaged area.(Wow!) Make sure to follow any instructions provided by the manufacturer for best results. Once you're satisfied with your work,(yippee!) leave it to dry completely before moving on.
Once everything has dried thoroughly,(by golly) take another round of sanding paper and gently smooth out any rough edges created during the filling or painting process.(Oops!) This step ensures that your garage door surface looks flawless once again!(I can't believe it!)
In conclusion,(well) by learning how to repair minor dents or scratches on your garage door surface, you can avoid those costly replacements. With just a few simple tools and techniques,(I mean) anyone can achieve fantastic results. So, don't let those dents and scratches bring you down!(Oh dear!) Take matters into your own hands and fix them yourself! You'll be amazed by the money you save and the satisfaction you gain from this DIY project.(Goodness gracious!)
Importance of regular maintenance routines, including cleaning, tightening hardware, and checking balance
In today's fast-paced, busy world, it is easy (not) to overlook the importance of regular maintenance routines for our garage doors. However, neglecting these essential tasks can lead to costly replacements that we definitely want (don't) to avoid! By implementing quick and simple do-it-yourself fixes (such as cleaning and tightening hardware while checking balance), we can ensure that our garage doors remain in optimal condition without breaking the bank.
Regular cleaning of your garage door may seem like a trivial task, but it plays a crucial role in maintaining its longevity. Dust, dirt, and debris can accumulate over time and cause damage to the door's mechanisms. By simply (not) taking a few minutes each week to wipe down your garage door with a damp cloth or mild detergent, you can prevent unnecessary wear and tear.
Tightening hardware is another vital aspect of regular maintenance that often goes unnoticed. Due to constant usage, vibrations, and weather conditions, screws and bolts on your garage door may become loose over time. Failure to tighten them regularly can result in parts becoming misaligned or even falling off altogether! To avoid such mishaps (which nobody wants), grab a wrench or screwdriver periodically and make sure all hardware is securely tightened.
Checking the balance of your garage door is equally important when it comes to avoiding costly replacements. An unbalanced door puts excessive strain on the opener mechanism, leading to premature wear and potential breakdowns. To test if your door is properly balanced, disconnect the automatic opener by pulling the release handle. Then manually lift the door halfway up; if it stays put without drifting upward or falling down abruptly (ouch!), you're good to go. However, if you notice any imbalance issues, consult a professional for prompt adjustments.
To sum up,(well) regular maintenance routines are indispensable for preventing expensive garage door replacements. By diligently performing tasks like cleaning,(ahem!) tightening hardware,(oops!)and checking balance, you can extend the lifespan of your garage door and save yourself from unnecessary financial burdens. So, don't wait until it's too late; start implementing these quick DIY fixes today!(finally) Your wallet will thank you later!